WP CRM Settings The Notifications Tab The Shortcode Forms Tab
This tutorial will cover the options present under the ‘Shortcode Forms’ Tab in WP-CRM Settings
The Shortcode Forms Table of WP-CRM settings contains the following options:
- Title: Use this setting to give your form a title.
- Shortcode: When the title of the form is entered, the Shortcode section is automatically generated by the plugin.
- Roles: The Roles dropdown box is used to choose what is the default type of user you want to create. Setting any role in this tab will give those privileges to every automatic user that is created. If you do not want to have any particular role assigned to every user who fills this form, set the roles to nil ( - ).
- Method: Choose “Post” option to upload files of your choice.

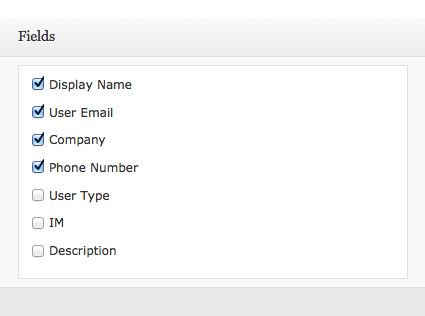
On the right side you can see a section with the title ‘Fields’. If you observe carefully, this section will display all the attributes you set in the Data table. You can now choose which of the fields you want to display on your website, in your form. You do not need to display all of the fields. Just check the fields you want displayed.
Below the Roles dropdown, you can see two check boxes.
Display text are for custom message: If checked by you, will display a small textbox, which lets your users enter a custom message while filling out your form. This is good way for the users to send you a quick comment or question.
Send message notification even if no message is submitted: If checked will notify you even if a users attempts to fill out your form, with actually hitting submit. Once all the options on the Shortcode Forms page are set, do not forget to click Save Changes.
You can make multiple forms at any time. If you select the ‘Add Row’ option located at the bottom, it will create a new form template for you and you will again need to go through and set all the above mentioned options on that form as well.
Once you have saved you form, simply select the shortcode that is automatically generated and copy it. Now you are free to paste it in a new or existing post, page or any other custom post type that you use, in WordPress, and publish it.
You can have multiple forms of the same page/post of on different pages on your website. Every form just needs to have a unique name.
To see list of variables you can use in wp_crm_contact_system_data open up the “Help” tab and view the user data structure. Any variable you see in there can be used in the subject field, to field, BCC field, and the message body. Example: [user_email] would include the recipient’s e-mail.
To add notification actions use the wp_crm_notification_actions filter, then call the action within wp_crm_send_notification() function, and the messages association with the given action will be fired off.
Options: You can set default role to use for new contacts(Administrator, Editor, Author, Contributor, Subscriber). WP-CRM creates user profiles, if only temporary, to store inquiries and messages from contact forms.
Shortcode Attributes
This is a list of attributes that can be added to the form shortcodes, to change various aspects of the form.
-
display_notes: _[ true false ]_ — If a note exists for a form field, it will be shown next to the attribute label. Defaults to “false”. -
require_login_for_existing_users: _[ true false ]_ - Sets whether or not existing users will be required to log in to the WordPress installation in order to submit the form. Defaults to “true”. -
use_current_user: _[ true false ]_ - Sets whether or not the submitted data will be added to or replace existing data from the current user’s profile. Defaults to “true”. - success_message: “custom text” — Sets the text message that will be displayed upon successful completion of the form. Default value is “Your message has been sent. Thank you.”.
- submit_text: “custom text” — Sets the text that will appear in the submit button. Default value is “Submit”.
- js_callback_function: “custom_function_name” — Sets the name of the Javascript function that will be called after the form has been submitted. Default value is “false” (no function set).
- js_validation_function: “custom_function_name” — Sets the name of the Javascript function that will be used to validate the field data. Default value is “false” (no function set).
Example:
[wp_crm_form form=example_from display_notes=true success_message="Your message was successfully sent!" submit_text="Send message!"]


