WP CRM Settings The Data Tab
This tutorial will cover the options present under the ‘Data’ Tab in WP-CRM Settings.
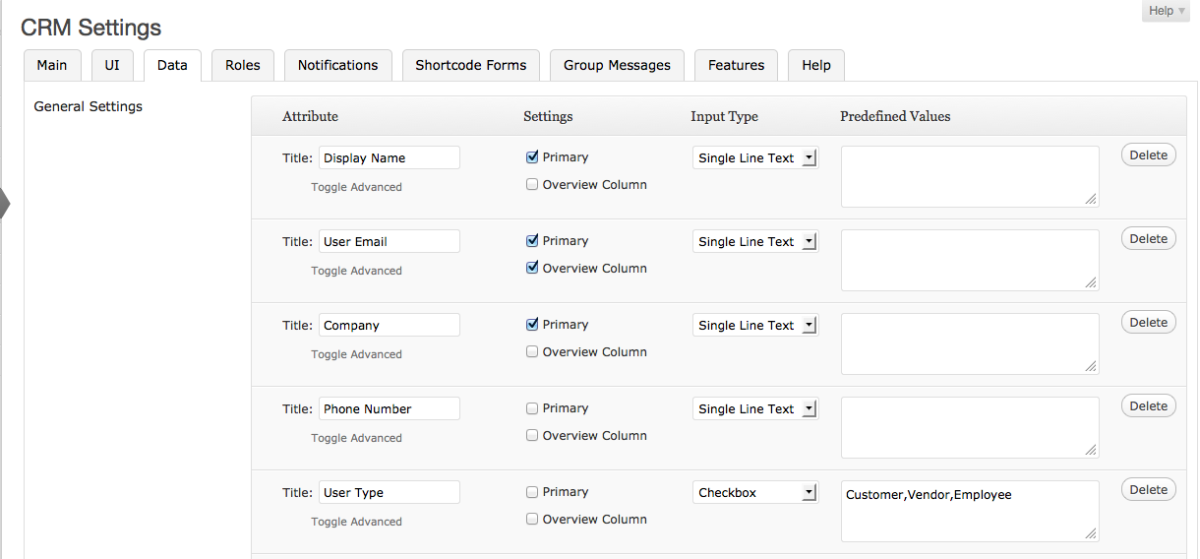
The Data tab is the starting point for both form creation and user data storage. In the Data table, you can add or edit attributes, in the form of rows, which specify the kind of information (i.e. attribute) you want to store about your user.
Let us see how we can go about setting custom attributes. An attribute has four sections:

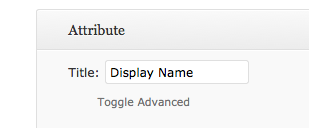
Title
This is the name of the attribute. E.g. Display name, Company name, Product type, Phone number and so on.
Settings
The two main options present under Settings are – Primary and Overview Column. The Primary option if selected, means, that attribute is an important one and will be put in a separate highlighted box at the beginning of every user profile. E.g. User Name can be a Primary attribute as it is essential to know who is your client.
If Overview Column is selected, it gives you the freedom to filter users based on that attribute. E.g. Product type can be an attribute that has overview column checked. Then while looking at you list of users, you can quickly filter them based on which of your products they are using.
Input Type
This section determines what type of data the user is expected to enter. E.g. User Name will have input type ‘Single Line Text’.
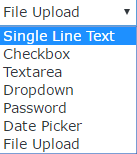
There are 6 types of input:
- Singe Line Text - Creates a text box which has a single line.
- Checkbox - Creates checkboxes whith the given options as titles. This is useful when you want your user to select one or more options from a group of options.
- Textarea - Creates a textarea which spans multiple lines.
- Dropdown - Creates a list which when clicked opens up and shows all the options in the list. This is useful when you want your user to select only one option from a bunch of options.
- Password - Creates a password field, meaning any text entered here will not be displayed as Astrix.
- File Upload - Allows the user to upload files.
Depending on the nature of the said attribute, you can set the input type.

Predefined Values
This section is set if there is a set of predefined options that the user is expected to select from. E.g. For attribute Product Type, of input type Check Box, a string of product names need to be entered in the predefined values sections. Suppose we have Product A, Product B and Product C. These will be entered in the predefined values section separated by commas and no spaces. There is no limit to the number of predefined values that can be entered.
Toggle Advanced
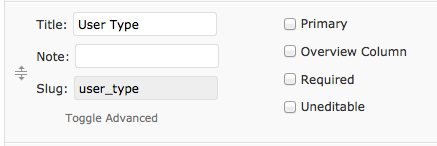
For every attribute, there is a ‘Toggle Advanced’ option located right below Title. Clicking this will open a few more rules that you can choose to set about that particular attribute.
- Note: Lets you add a custom note about that attribute for you reference.
- Slug: Lets you choose a slug.
Under the Settings section, two more options open up,
- Required: If checked, that attribute value is absolutely compulsory to be entered before a record can be saved.
- Uneditable: Makes that attribute non changable once a value has been entered.
The ‘Add Row’ button at the very bottom lets you add you own custom attributes. Every attribute has a ‘Delete’ button on it, which lets you delete any of them at any time. There is no limit on the number of attributes you can add to the Data table.


